Alarm Clocks Instructions

1. SAVE ALL PACKING AND PAPERWORK! Although each clock has been carefully inspected before
shipment, you will need everything in case of any problems.
2. Carefully remove the clock from the box and surrounding packaging.
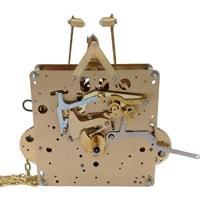
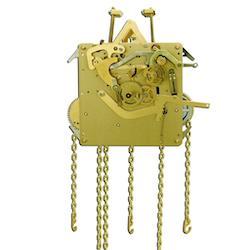
3. Wind the keys. One key powers the time, and the other powers the alarm. CAREFUL! These keys, along
with the alarm setting knob, are reverse-threaded. Be sure to turn these only in the direction indicated by the
arrow. If you turn them the wrong way, the key will come off and you will risk wearing - or cross-threading -
the shaft. Wind the key COUNTER-clockwise in order to wind the clock. Keep in mind that this is the
one step where some force may be used. It is not likely for you to be able to break the coiled steel spring by
twisting too hard with the key. These springs have safety catches to prevent damage.
For a day’s run, be sure to wind until the key comes to a complete stop.
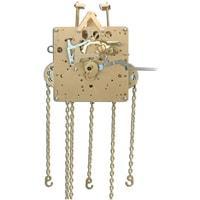
4. If the clock strikes the bells while winding the alarm key, move the alarm hand away from the hour by
turning the knobs on the back. Or, simply move the lever next to the alarm hammer to silence the strike.
5. The clock should begin running. Listen for a ticking sound. It may be necessary to gently rock the clock to
start the balance wheel ticking.
6. Set the time hands and the alarm indicator to the desired time by turning the knobs on the back. Be sure to
turn the knobs in the direction indicated by the arrow. If you turn them the wrong way, they may become
loose and come off. Removing the knobs or keys too often can cause wear or cross-threading.
Some minor regulation may be necessary. There is a tab at the back of the clock with a plus and minus marking.
Move this tab towards the plus in order to speed the clock up, or to the minus to slow the time keeping down.
Notice that the direction to move the tab is counter-intuitive. You need to move the tab to the RIGHT to SLOW
the clock, and to the LEFT to SPEED the clock up. Make sure to make VERY small adjustments, as a tiny
adjustment will make a considerable difference. You will need to readjust the hands whenever you make an
adjustment with the tab.
In the unlikely event that you have some trouble with your new clock, call us right away. We will find a solution and if need be, send a replacement right away
You probably know how to set the time and the alarm but still, here is a nice video prepared by Dolf Kamper of Sternreiter Clocks. Dolf uses gold and silver alarms in his presentation but there are many colors available